How to build Buildroot for AT91
Prerequisites
Host build system should be a Linux system with necessary software$ sudo apt-get install libssl1.0-devor, depending on your host distribution:
$ sudo apt-get install libssl-dev
yum install with Fedora or apt-get install with Ubuntu or Debian. These commands may require root privileges or being in a correct sudoers group.
Get sources
To get the source code, you have to clone the buildroot-at91 and buildroot-external-microchip repositories. buildroot-at91 is a fork of Buildroot with a minimal amount of patches, only the ones which have not hit the mainline yet. The external tree provides stuff which won't hit the mainline: additional defconfigs and packages dedicated to our demos.$ git clone https://github.com/linux4sam/buildroot-at91.git Cloning into 'buildroot-at91'... remote: Counting objects: 271126, done. remote: Compressing objects: 100% (2/2), done. remote: Total 271126 (delta 0), reused 2 (delta 0), pack-reused 271124 Receiving objects: 100% (271126/271126), 61.00 MiB | 2.36 MiB/s, done. Resolving deltas: 100% (186357/186357), done. $ ls buildroot-at91/ arch board boot CHANGES Config.in Config.in.legacy configs COPYING DEVELOPERS docs fs linux Makefile Makefile.legacy package README support system toolchain utils $ git clone https://github.com/linux4microchip/buildroot-external-microchip.git Cloning into 'buildroot-external-microchip'... remote: Counting objects: 571, done. remote: Compressing objects: 100% (159/159), done. remote: Total 571 (delta 217), reused 288 (delta 170), pack-reused 225 Receiving objects: 100% (571/571), 94.41 KiB | 76.00 KiB/s, done. Resolving deltas: 100% (332/332), done. $ ls buildroot-external-microchip/ board Config.in configs COPYING docs external.desc external.mk package patches README.md systemThe source code has been taken from the
master branch which is pointing to the latest version of buildroot-at91 and buildroot-external-microchip. We advise you to use linux4sam tags to be sure that there is no mismatch between the versions of these two repositories.
You can list them and use one of them by doing this:
$ cd buildroot-external-microchip/
$ git tag | grep linux4microchip
linux4microchip-2022.10
linux4microchip-2022.10-rc1
linux4microchip-2022.10-rc2
linux4microchip-2022.10-rc3
linux4microchip-2022.10-rc4
linux4microchip-2023.04
linux4microchip-2023.04-rc1
linux4microchip-2023.04-rc2
linux4microchip-2023.10
linux4microchip-2023.10-rc1
linux4microchip-2023.10-rc2
linux4microchip-2023.10-rc3
linux4microchip-2023.10-rc4
$ git checkout linux4microchip-2023.10 -b buildroot-external-microchip-linux4microchip-2023.10

$ cd ../buildroot-at91/
$ git tag | grep linux4microchip
linux4microchip-2023.04
linux4microchip-2023.04-rc1
linux4microchip-2023.04-rc2
linux4microchip-2023.10
linux4microchip-2023.10-rc1
$ git checkout linux4microchip-2023.10 -b buildroot-at91-linux4microchip-2023.10
Build the rootfs image
Assuming you are at the Buildroot root directory, you'll find aconfigs folder containing several default configurations. If you are familiar with kernel configuration, you'll see that it works in the same way.
For the same board, several defconfig files are provided inside the buildroot-at91. These defconfigs are from upstream and, as said above, without the richness of a full linux4sam release. They can be used for a minimal test image. -
atmel_[soc]_xplained_defconfigprovides at91bootstrap, u-boot, the kernel image and dtb files, a very basic rootfs for NAND flash memory. -
atmel_[soc]_xplained_mmc_defconfigprovides the same stuff but for SD card. Moreover a SD card image is done to ease the creation of the bootable SD card. -
atmel_[soc]_xplained_dev_defconfigandatmel_[soc]_xplained_mmc_dev_defconfigprovide a rootfs with additional tools to use SoC devices (I2C, CAN, audio, etc.).
configs folder: -
[soc]_[board]_headless_defconfigprovides barely the same stuff asatmel_[soc]_xplained_mmc_dev_defconfigplus AWS greengrass or other command-line tools, but with no graphics related packages. -
[soc]_[board]_graphics_defconfigprovides the same stuff plus a full graphics (EGT) demo.
$ make atmel_sama5d2_xplained_mmc_defconfig
$ BR2_EXTERNAL=../buildroot-external-microchip/ make sama5d2_xplained_graphics_defconfigThen you can build the rootfs:
$ makeOnce compilation is done, have a look to
output/images to see what has been generated:
$ ls output/images/
at91bootstrap.bin          rootfs.ext2                       sama5d2_xplained_isc.dtbo     sama5d2_xplained_pda4.dtbo   sama5d2_xplained_qspi.dtbo                    zImage
at91-sama5d2_xplained.dtb  rootfs.ext4                       sama5d2_xplained.itb          sama5d2_xplained_pda5.dtbo   sama5d2_xplained-sdcardboot-uboot-3.9.0.bin
boot.bin                   rootfs.tar                        sama5d2_xplained_ov7670.dtbo  sama5d2_xplained_pda7b.dtbo  sdcard.img
boot.vfat                  sama5d2_xplained_i2s0_proto.dtbo  sama5d2_xplained_ov7740.dtbo  sama5d2_xplained_pda7.dtbo   u-boot.bin
You can have a look at the Create a SD card with the demo page to create an SD card from the
sdcard.img file. If you want to flash NAND or whatever memory you want with Sam-Ba, please go to the Using SAM-BA to flash components to board section of your board.
Cross toolchain
While creating the rootfs, Buildroot will build a cross toolchain (or will download or use one present on your machine). You can find it underoutput/host/usr:
$ ls output/host/usr/bin
2to3                                             arm-linux-gcc-ranlib  fdtoverlay                libpng-config     python3.7m-config
2to3-3.7                                         arm-linux-gcov        fdtput                    libtool           python3-config
aclocal                                          arm-linux-gcov-dump   fincore                   libtoolize        python-config
aclocal-1.15                                     arm-linux-gcov-tool   findmnt                   linux32           python-freeze-importlib
arm-buildroot-linux-gnueabihf-addr2line          arm-linux-gdb         fixqt4headers.pl          linux64           pyvenv
arm-buildroot-linux-gnueabihf-ar                 arm-linux-gprof       flex                      linux-dtc         qdbuscpp2xml
arm-buildroot-linux-gnueabihf-as                 arm-linux-ld          flex++                    logger            qdbusxml2cpp
arm-buildroot-linux-gnueabihf-c++                arm-linux-ld.bfd      flock                     look              qlalr
arm-buildroot-linux-gnueabihf-c++.br_real        arm-linux-nm          gapplication              lrelease          qmake
arm-buildroot-linux-gnueabihf-cc                 arm-linux-objcopy     gawk                      lsattr            qmlcachegen
arm-buildroot-linux-gnueabihf-cc.br_real         arm-linux-objdump     gdbus                     lsblk             qmlimportscanner
arm-buildroot-linux-gnueabihf-c++filt            arm-linux-ranlib      gdbus-codegen             lscpu             qmllint
arm-buildroot-linux-gnueabihf-cpp                arm-linux-readelf     gdk-pixbuf-csource        lsipc             qmlmin
arm-buildroot-linux-gnueabihf-cpp.br_real        arm-linux-size        gdk-pixbuf-pixdata        lslocks           qt.conf
arm-buildroot-linux-gnueabihf-elfedit            arm-linux-strings     gdk-pixbuf-query-loaders  lsmem             qvkgen
arm-buildroot-linux-gnueabihf-g++                arm-linux-strip       gdk-pixbuf-thumbnailer    lsns              rake
arm-buildroot-linux-gnueabihf-g++.br_real        attr                  gem                       lupdate           rcc
arm-buildroot-linux-gnueabihf-gcc                autoconf              genbrk                    lzip              rdjpgcom
arm-buildroot-linux-gnueabihf-gcc-7.4.0          autoheader            gencfu                    m4                rdoc
arm-buildroot-linux-gnueabihf-gcc-7.4.0.br_real  autom4te              gencnval                  makeconv          rename
arm-buildroot-linux-gnueabihf-gcc-ar             automake              gendict                   makedevs          renice
arm-buildroot-linux-gnueabihf-gcc.br_real        automake-1.15         genimage                  mcookie           reset
arm-buildroot-linux-gnueabihf-gcc-nm             autopoint             genrb                     meson             rev
arm-buildroot-linux-gnueabihf-gcc-ranlib         autoreconf            getfacl                   mk_cmds           ri
arm-buildroot-linux-gnueabihf-gcov               autoscan              getfattr                  mkenvimage        ruby
arm-buildroot-linux-gnueabihf-gcov-dump          autoupdate            getopt                    mkimage           script
arm-buildroot-linux-gnueabihf-gcov-tool          bison                 gettextize                mkpasswd          scriptreplay
arm-buildroot-linux-gnueabihf-gdb                cal                   gio                       moc               setarch
arm-buildroot-linux-gnueabihf-gprof              captoinfo             gio-querymodules          mount             setfacl
arm-buildroot-linux-gnueabihf-ld                 chacl                 glib-compile-resources    mountpoint        setfattr
arm-buildroot-linux-gnueabihf-ld.bfd             chattr                glib-compile-schemas      msgfmt            setsid
arm-buildroot-linux-gnueabihf-nm                 choom                 glib-genmarshal           msgmerge          sip
arm-buildroot-linux-gnueabihf-objcopy            cjpeg                 glib-gettextize           namei             smtpd.py
arm-buildroot-linux-gnueabihf-objdump            clear                 glib-mkenums              ncurses6-config   smtpd.py.7
arm-buildroot-linux-gnueabihf-ranlib             cmake                 gobject-query             ninja             swig
arm-buildroot-linux-gnueabihf-readelf            col                   gperf                     node              swig3.0
arm-buildroot-linux-gnueabihf-run                colcrt                gresource                 npm               syncqt.pl
arm-buildroot-linux-gnueabihf-size               colrm                 gsettings                 npx               tabs
arm-buildroot-linux-gnueabihf-strings            column                gtester                   openssl           tic
arm-buildroot-linux-gnueabihf-strip              compile_et            gtester-report            patchelf          toe
arm-linux-addr2line                              convert-dtsv0         hexdump                   pcre-config       toolchain-wrapper
arm-linux-ar                                     cpack                 i386                      pcregrep          torque
arm-linux-as                                     c_rehash              icu-config                pcretest          tput
arm-linux-c++                                    ctest                 icuinfo                   pkgconf           tset
arm-linux-c++.br_real                            djpeg                 ifnames                   pkg-config        uic
arm-linux-cc                                     dmesg                 infocmp                   pkgdata           umount
arm-linux-cc.br_real                             dtc                   infotocap                 prlimit           uname26
arm-linux-c++filt                                dtdiff                ipcmk                     pydoc             utmpdump
arm-linux-cpp                                    dumpimage             ipcrm                     pydoc3            uuidgen
arm-linux-cpp.br_real                            easy_install          ipcs                      pydoc3.7          uuidparse
arm-linux-elfedit                                easy_install-2.7      irb                       python            whereis
arm-linux-g++                                    easy_install-3.7      isosize                   python2           wrjpgcom
arm-linux-g++.br_real                            eject                 jpegtran                  python2.7         x86_64
arm-linux-gcc                                    erb                   kill                      python2.7-config  xgettext
arm-linux-gcc-7.4.0                              faked                 kmod                      python2-config    xmlwf
arm-linux-gcc-7.4.0.br_real                      fakeroot              last                      python3           yacc
arm-linux-gcc-ar                                 fallocate             lastb                     python3.7
arm-linux-gcc.br_real                            fdtdump               lconvert                  python3.7-config
arm-linux-gcc-nm                                 fdtget                libpng16-config           python3.7m
make clean, you will delete the rootfs but also the cross toolchain. You can save the cross toolchain in another place. Moreover you can tell Buildroot to use it to save time for next compilations. To do it run make menuconfig then go to the Toolchain menu. Then select External toolchain as Toolchain type, Custom toolchain as Toolchain, Pre-installed toolchain as Toolchain origin. Finally set Toolchain path and Toolchain prefix.
Customizing Buildroot
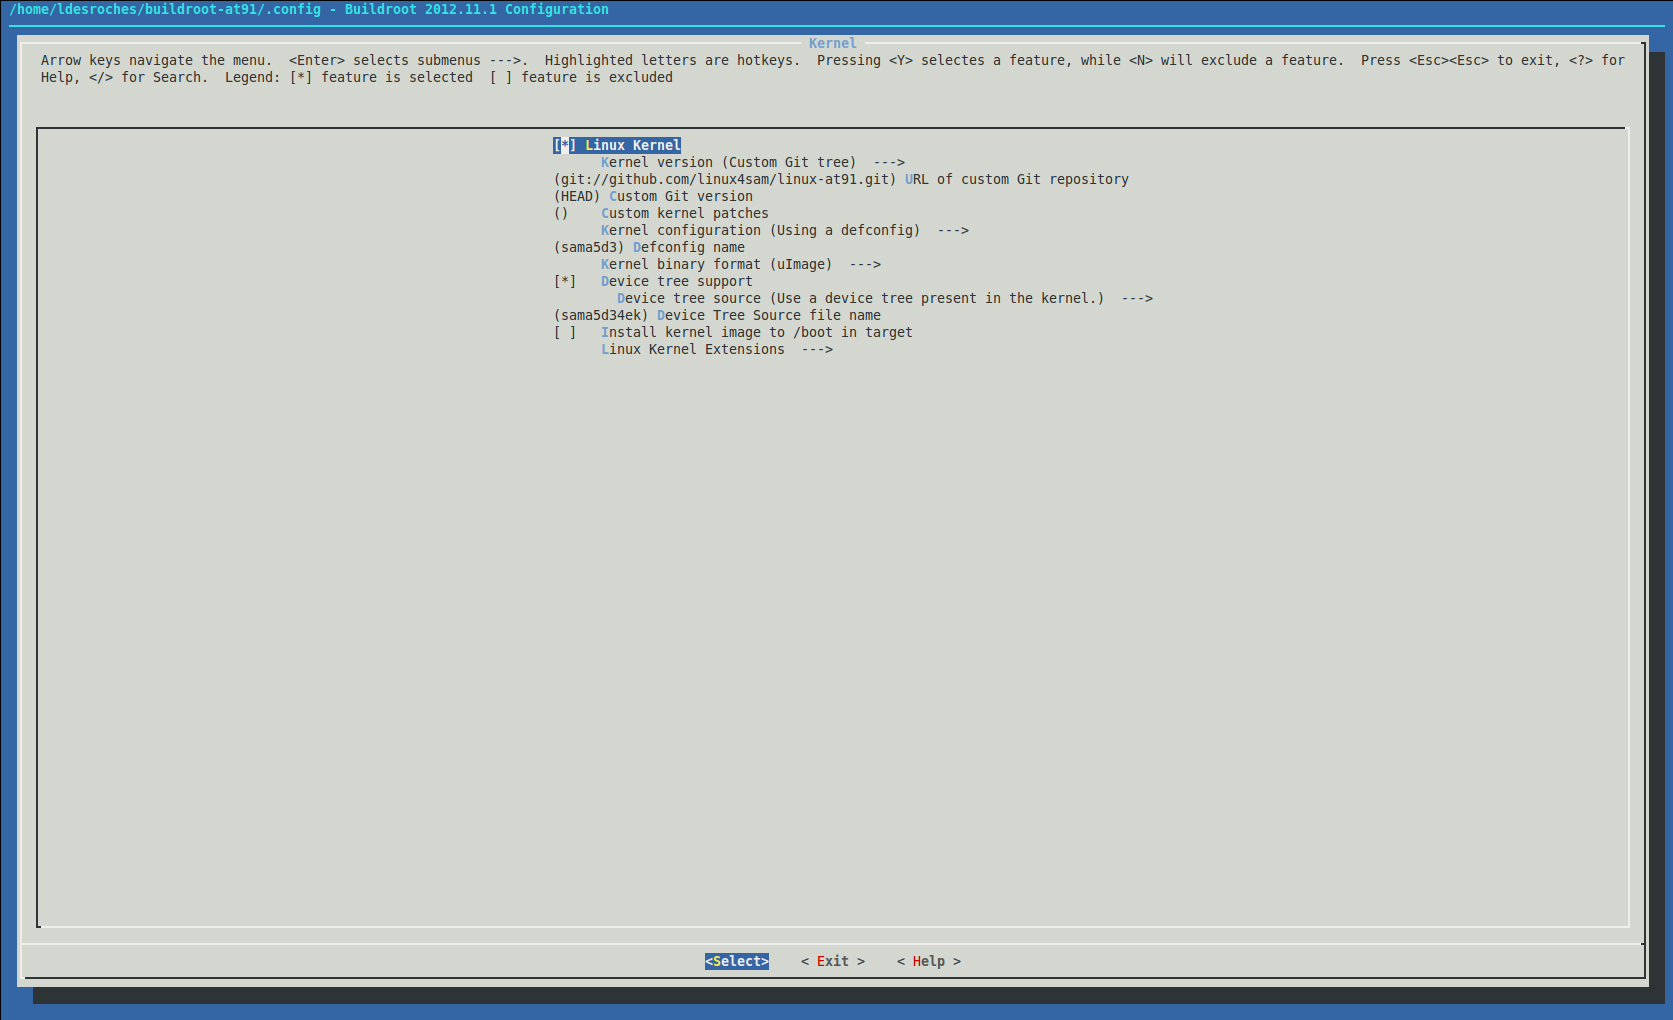
Before building the rootfs image, you may want to customize it: adding/removing packages, modifying component configurations such as busybox and uclibc, generate the kernel, etc.Customizing Busybox / Linux / U-boot / uClibc configuration
All the explanations are available in the Buildroot manual Configuration of other componentsAdding/removing packages from the rootfs
You can easily add or remove packages from the rootfs. You simply have to do:BR2_EXTERNAL=../buildroot-external-microchip/ make menuconfigand to go to the
Package Selection for the target menu. Packages are sorted by categories:
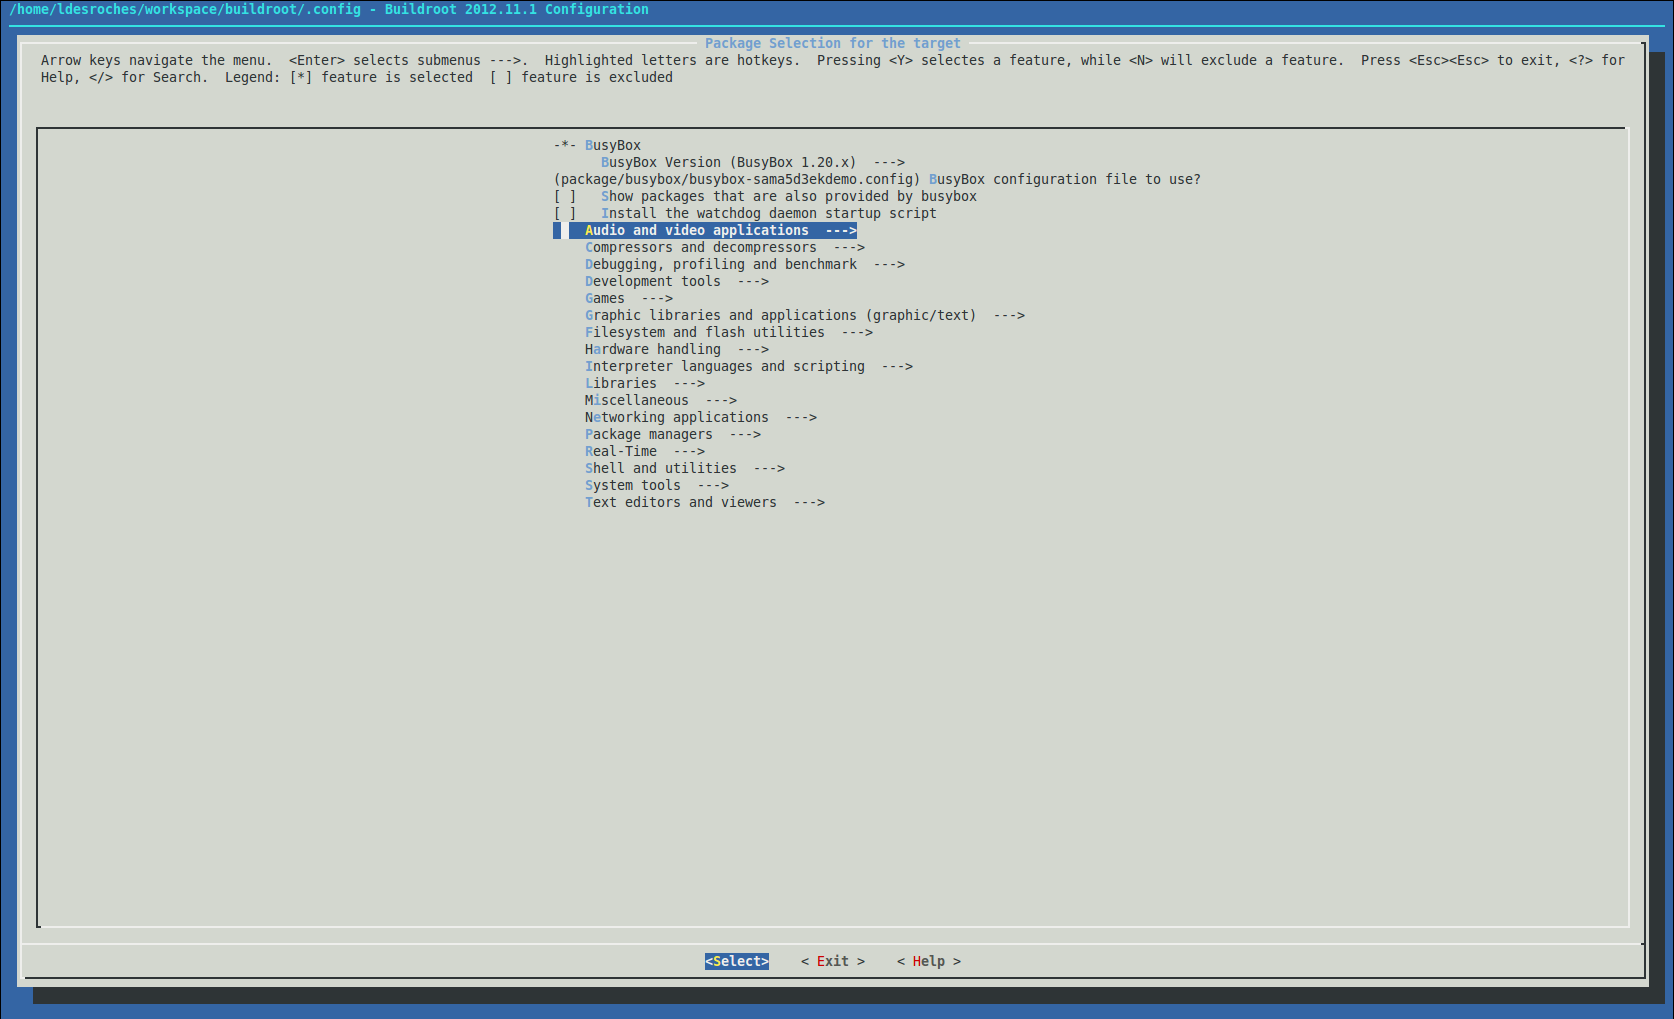 You simply have to go in the desired category and to select or deselect the packages you want. Once done, you can build your rootfs.
make clean and to rebuild the whole rootfs to be sure that the packages will be removed.
Updating the rootfs for another nand flash device
The rootfs are configured to run on the nand flash device present on atmel boards. If you use another one you may have to update some parameters. To do it, runmake menuconfig and go to Filesystem images:
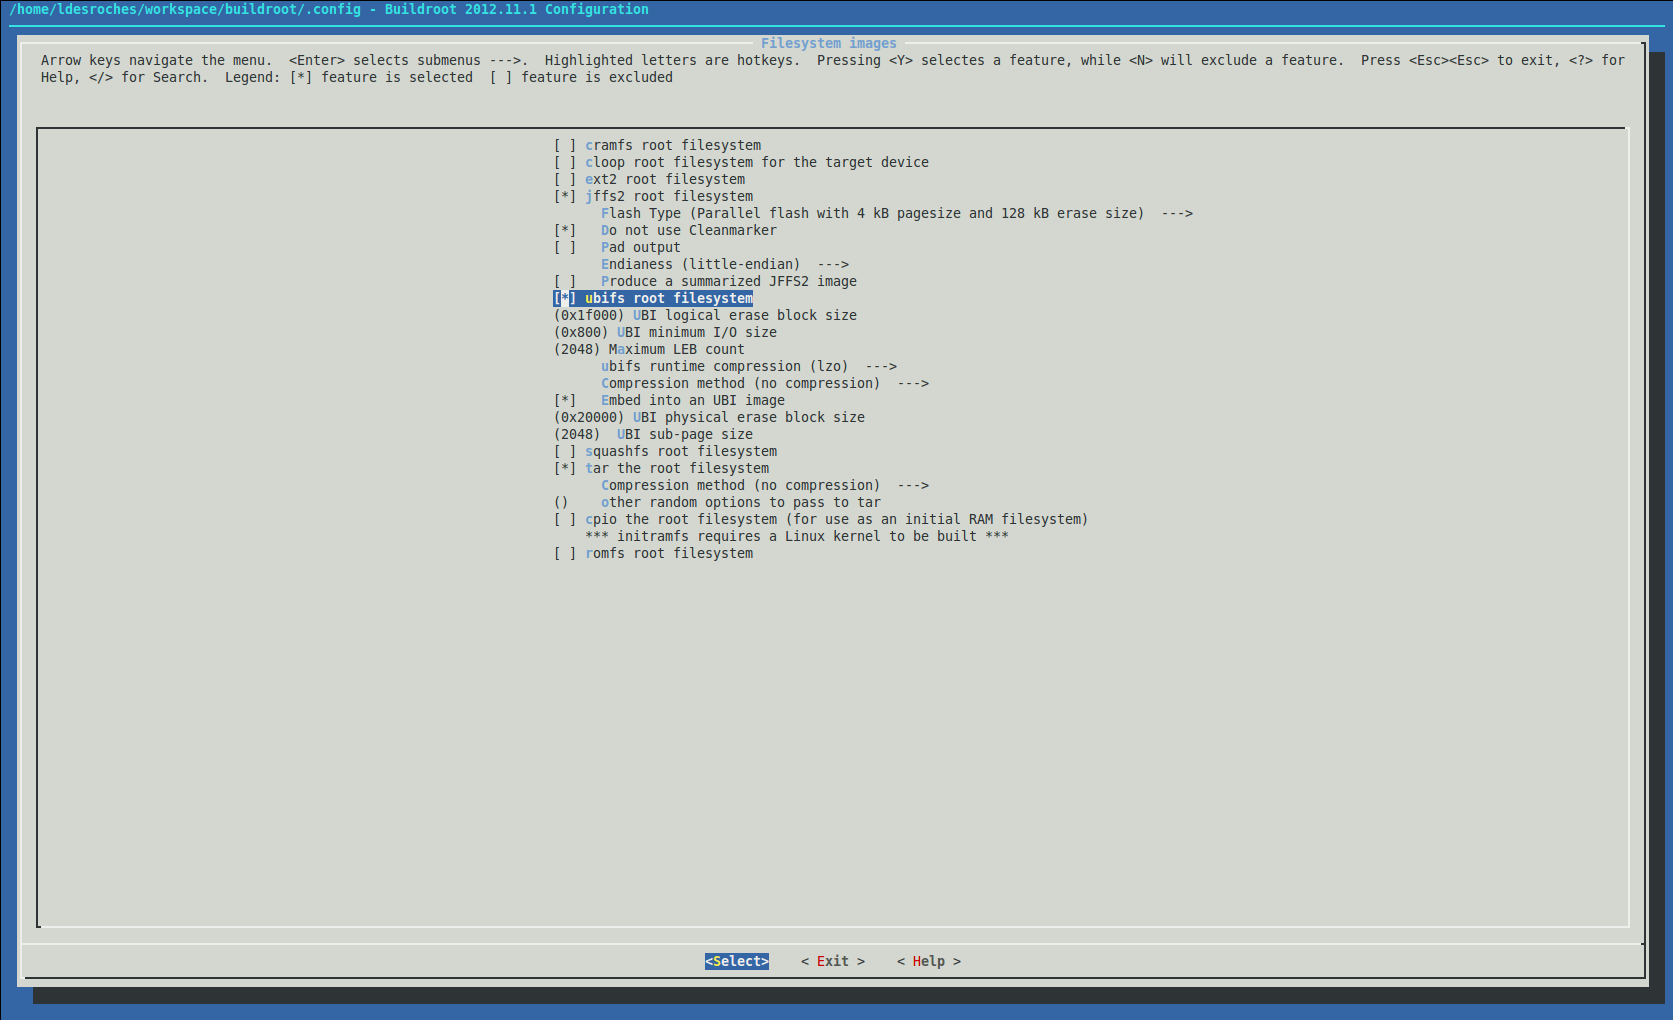 For a jffs2 root filesystem, you may have to update the page and erase size from
 Flash Type.
For a ubifs root filesystem, you may have to update the UBI logical erase block size, the UBI minimum I/O size, the Maximum LEB count, the UBI physical erase block size and the UBI sub-page size. You can find more information about these parameters in the ubi documentationAdd your own software to Buildroot
Builroot is basically a big set of makefiles so you will have to follow some steps to insert your own application to the cross-building system. You should have a look at the official documentation

|
|||||||||||||||||||||||||||||
r38 - 20 Dec 2023 - 10:08:16 - DharmaBalasubiramani
Linux4SAM
Open source solutions ApplicationsBoards
- SAMA5D29 Curiosity
- SAM9X60 Curiosity
- SAMA7G5-EK
- SAMA5D2-ICP
- SAMA5D27 WLSOM1 EK
- SAM9X60-EK
- SAMA5D27 SOM1 EK
- SAMA5D2 PTC EK
- SAMA5D2 Xplained
- SAMA5D3 Xplained
- SAMA5D4 Xplained
- Older boards
FAQ
Useful links
- Microchip Microprocessors forums
- AT91 Community (archive)
- Microchip
- Linux4Microchip on GitHub
- Linux4SAM on GitHub
NAVIGATION
Copyright © by the contributing authors. All material on this collaboration platform is the property of the contributing authors.
Linux® is the registered trademark of Linus Torvalds in the U.S. and other countries.
Microchip® and others, are registered trademarks or trademarks of Microchip Technology Inc. and its subsidiaries. ![]()
Arm® and others are registered trademarks or trademarks of Arm Limited (or its affiliates). Other terms and product names may be trademarks of others.
Ideas, requests, contributions ? Connect to LinksToCommunities page.